|
CFLsurf Home Page
|| About this Site
|| Photo Galleries
|| Surf the Web ||
Return to Repair Series
Page
Part 5 of Ross's Famous Surfboard Repair Series (in progress)
The Mother of All Surfboard Repairs Comes Back Again
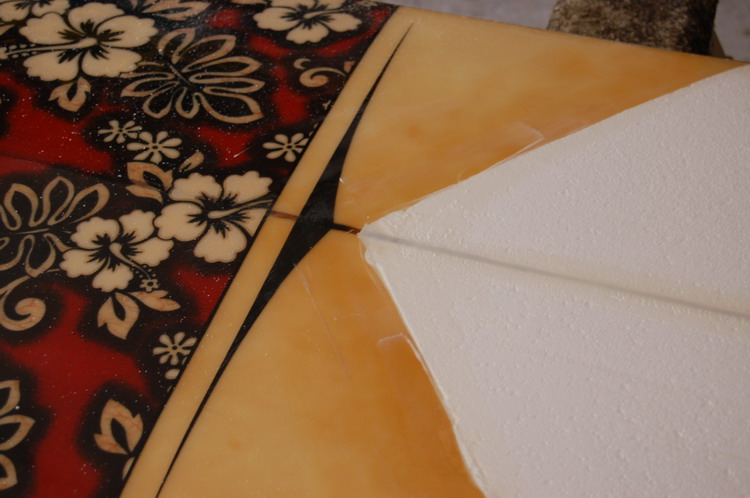
It has been said that we learn more from our mistakes than from our successes. Thus, perhaps this board is a valuable learning experience. The picture below shows the board just after I finished glassing following a major pour-foam repair of the deck last year. The repair held up very well until we took the board to Nosara, Costa Rica. I don't know if it was low pressure in the baggage compartment on the aircraft or the big waves in Nosara, but the pour foam pulled away from the white core foam in the entire patched area. When I sliced the deck open, I discovered that the bond of the cloth laminate to the pour foam was solid. Almost all of the pour foam peeled up with the decking when I ripped it off. But the original core foam was too deteriorated to hold a bond with the pour foam. The bond did not separated, it just lifted the top most layer of original core foam. |

|
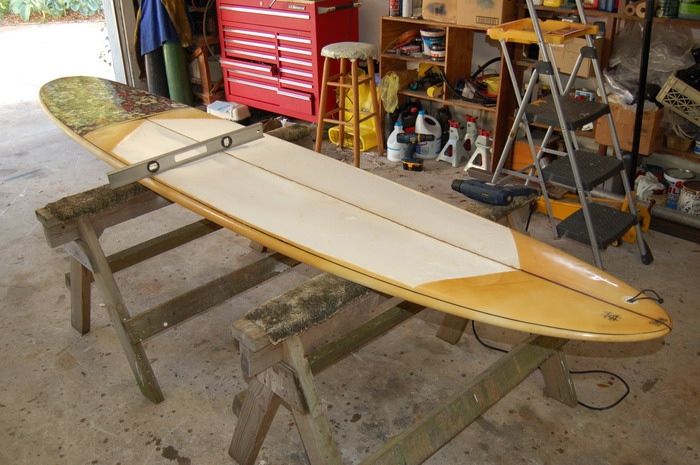
Above - Just after glassing on the last repair job (which was the 2nd deck rebuild). |
|
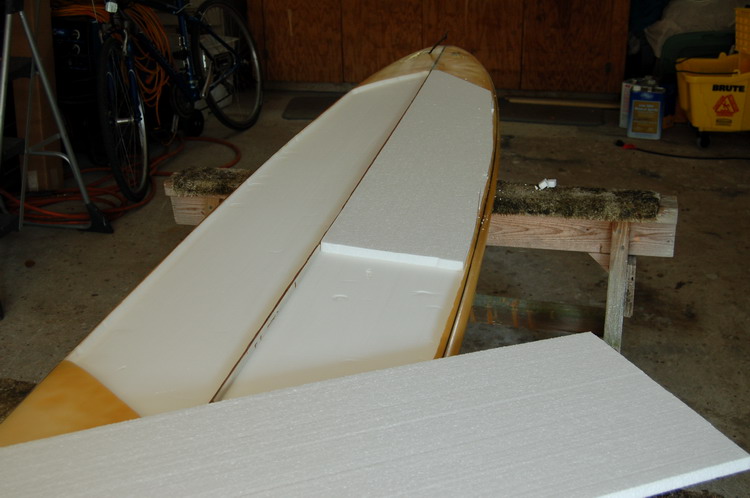
I cut the around the damaged deck with a small Dremal tool circular saw blade. It slices right through the deck and only cuts about 1/4 inch deep. I then just grabbed one end and just peeled it upward. |
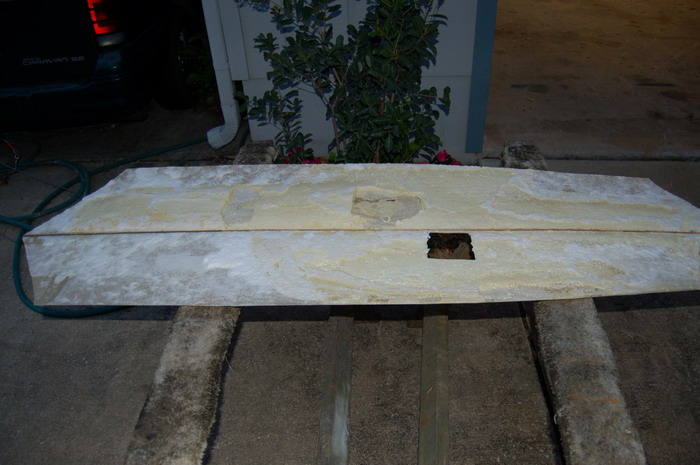
| The cutout is 6'2" long. I made the cut out symetrical instead of just tracing the delaminated area. It is easier to fix that way. The square hole in the cut out decking was my exploratory surgery. I wanted to see why it delaminated before I ripped the entire deck off. Almost all of the pour foam came up with the deck. |
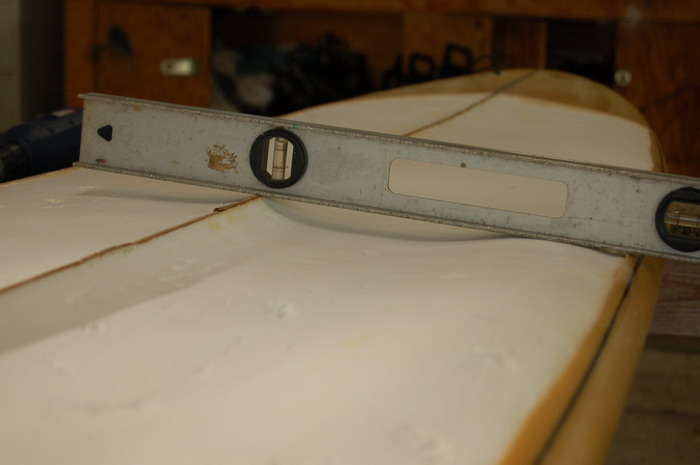
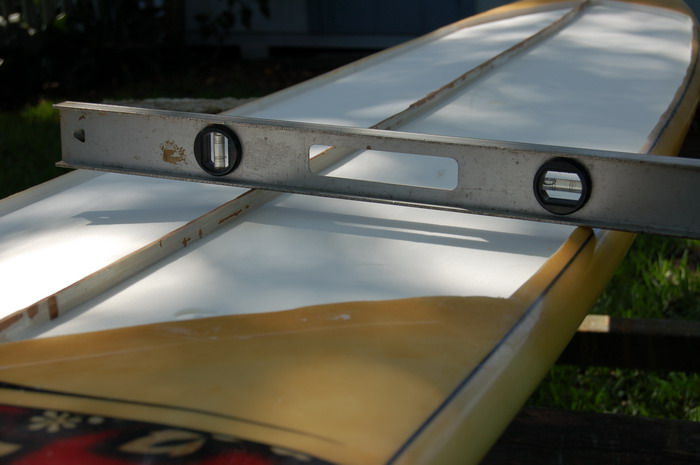
| The above pic is after sanding the foam. The area below the level was the worst area, but a lot of the old foam was very soft and did not appear to be in condition to hold a good bond to anything. |
|
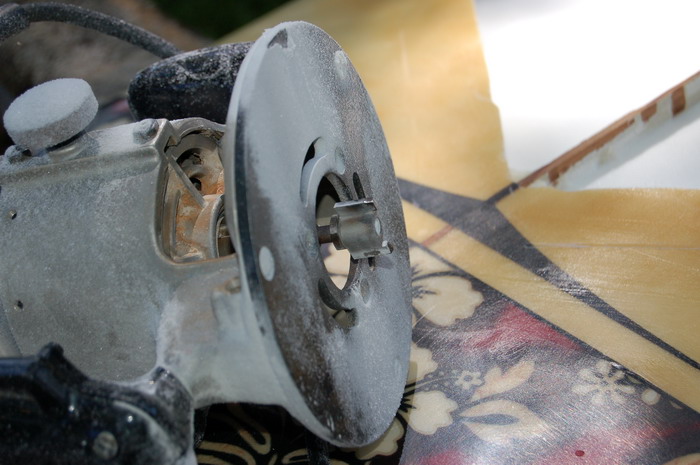
I routered all the way around the the cut out and on each side of the stringer. Then, using a thin straight edge tool as a guide I routered out most of the middle foam. The router will cut right through the stringer or the edge of the cut out, so I had to be careful with that thing. It makes a major mess but doesn't take very long to do. Goggles and a good dust mask are essential. This is one of those jobs that is best done in a remote corner of your back yard unless you want to vacume clean your entire work shop after routering. |
|
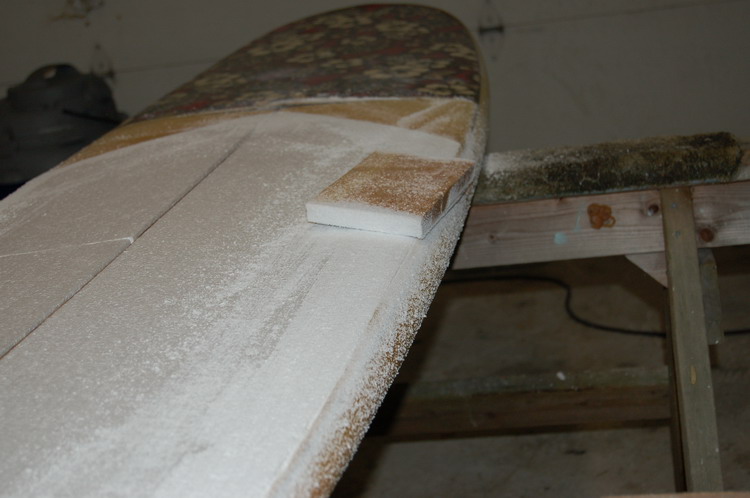
After I was done with the router, I used a flat bladed kichen knife to cut down any leftover foam bumps and block sanded to make the bottom of the cut out area even. The cut out is about 5/8" deep, and took the area down into nice solid white foam. I think the repair will bond good and hold well this time. It took me about two hours to cut out the deck and router down the foam. I am pretty slow since I am learning as I go. I have never seen a board reapired like this before, but some posts on Swaylocks.com mentioned something about routering out rotted foam. |

|
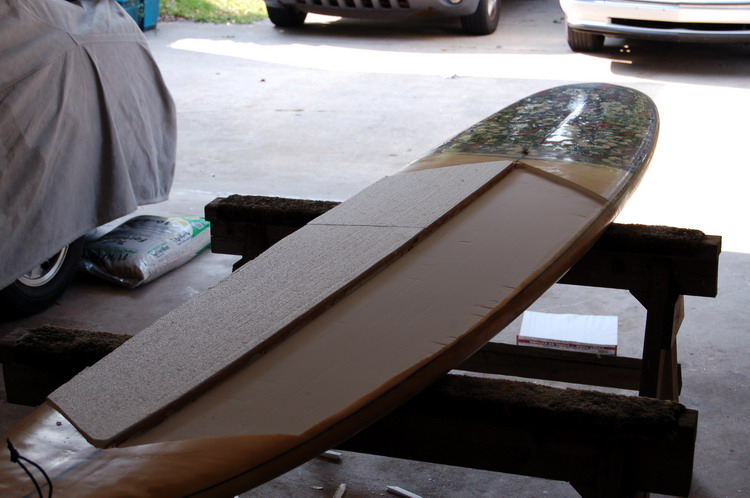
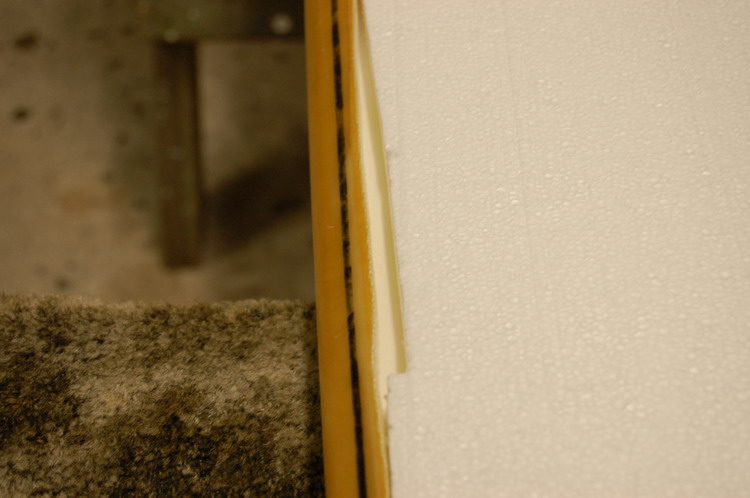
Today is April 24, 2007. I am currently investigating how I want to proceed. I could use the polyurethane pour foam again, or I could glue in panels of polystyrene foam. Since I really like this board, and since this will probably be my last shot at saving it, I want to fix it the best possible way. I plan to ask a few local area shapers what they recommend. One of the things that has caught my attention is the use of extruded polystyrene foam. That's the blue (or pink) insulation board they sell at places like Home Depot. It is a lot tougher than the expanded polystyrene (white) foam, but bonding is an issue I need to look into. May 12, 2007. I decided against the pour foam. It is just too much work for an area this big. Several shapers and professional board repair folks recommended using polystyrene foam panels. So that is what I decided to do. I have used the extruded polystyrene (blue board) several times. It is tough stuff, and there are several shops in California that make boards using this foam. But it is so tough it is a struggle to shape by hand. I am sure the pros have it down to a science, but all I have is 40 grit sandpaper fastened to a 10 inch board. So I decided expanded polystyrene would do just fine. Although I know several shapers that use polystyrene foam, they were all "gone surfing" at the time, so I just bought a pack of the 48 inch long panels at Home Depot for $7.00. This foam at Home Depot isn't marked as to what it's density is. The most common polystyrene foam used for surfboards seems to be the 2 pounds per cubic foot density. The stuff at home depot is probably 1.5 pounds per cubic foot density, but I really can't tell. The foam in the 48" bundles had slightly smaller cells and was noticeably tougher than the 4 foot by 8 foot sheets, so that is what I bought.
The foam cuts very easily with a sharp broad-bladed kitchen knife. I took my time and made it fit pretty snug. In places where I missed the cut and ended up with a gap, I stuffed in slivers of foam to fill the gaps. It didn't take very long to cut and fit the panels.
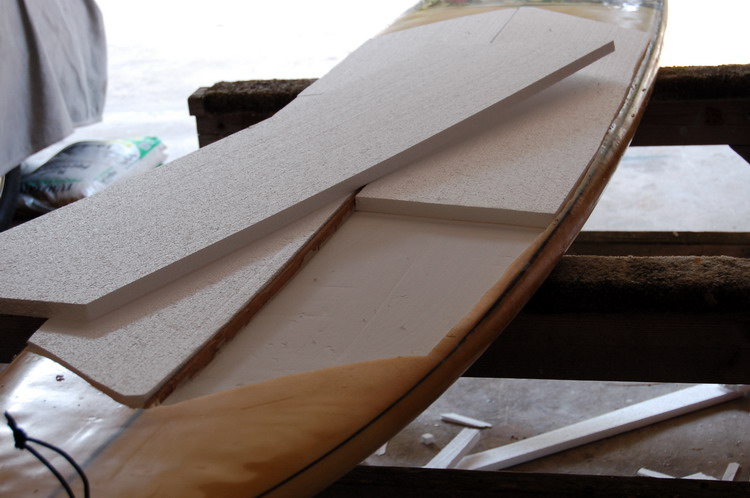
Notice that since I used 48" panels, I have seams. I offset the seams such that I don't have a seam running all the way across the board. If I had used the sheet foam, I wouldn't have had the seams, but the seams don't bother me a bit since I plan to put three layers of 6 ounce cloth over the entire patch. The 3/4 inch thick foam panels worked out very well since I had only routered down about 5/8 of an inch. I won't have to do a great deal of shaping, which is good since I have to do it by hand. I have a power planner, but it just makes too much of a mess. After forming the panels to fit, I carefully pulled then back out and mixed up a batch of catalyzed epoxy resin and glass spheres to make a thick paste to glue in the panels.
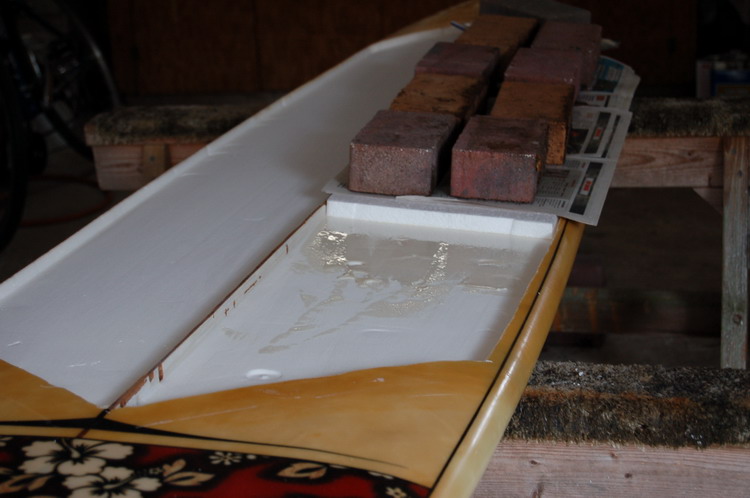
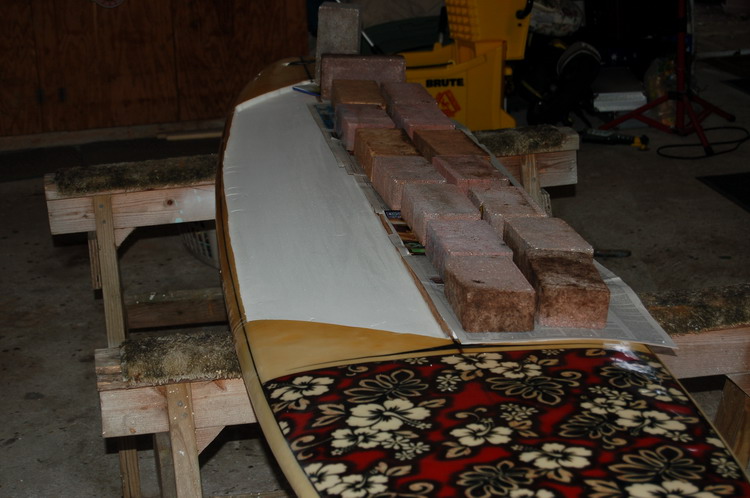
After pouring in the glue mix, I spread it around with a squeezy. I was pretty liberal with the glue since I am not really concerned with holding weight to a bare minimum on this board. It's a small wave cruiser for summer swells. But since the foam weighs next to nothing, even with all the glue mix and three layers of 6 oz cloth I plan to put on it, the board may weigh a little less than it did before this patch. If weight was a primary concern, I would have used Gorilla Glue. An 8 oz bottle of Gorilla Glue cost $12 to $14, but is just about the toughest light weight water proof glue you can buy. It is also sandable after it hardens. Since I had just bought a whole gallon of epoxy resin, I just used that. I am sure it will hold the foam just fine.
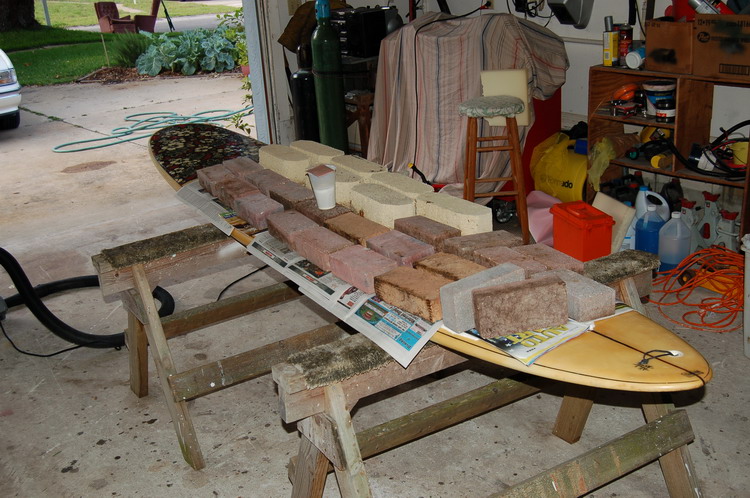
Yes, that's probably 100 pounds (or more) of bricks I borrowed from my wife's garden. I positioned the saw horses to distribute the loads. It would have been a good idea to place some wood supports between the saw horses. Now I'll wait until tomorrow morning to give it plenty of time to set up even though I used a fast epoxy hardener and it was very hot this day. The whole process took about an hour, and I am not very fast. The hardest part was digging up all the bricks from around the yard.
The next morning it was ready for shaping. Just out of interest I did a weigh in. The board weighted 23 pounds when I started (but that might be the weight with the fin). At this stage, just after gluing in the polystyrene panels, it weighed 17.5 pounds. I was off a little bit on some of my cuts, leaving gaps that were just a little too big to plug with filler. For these, I cut thin slices or plugs of foam, stuffed them in tight, and sanded them down. When I pour in the filler, these plugs will bond in to the rest of the foam.
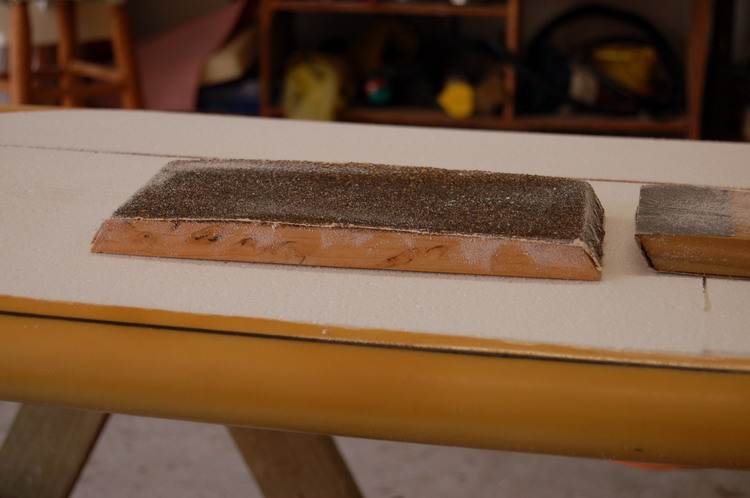
Shaping was done with coarse sandpaper fastened to a 12 inch long wood block. The polystyrene sands down easily, so only light pressure is needed. Each stroke should go the entire length of the patch. If you scrub in one area you will get an uneven surface. It only took about 5 minutes to shape in the foam.
The wood blocks are essential to getting a smooth even finish. One block has 40 grit and the other has 80 grit sandpaper.
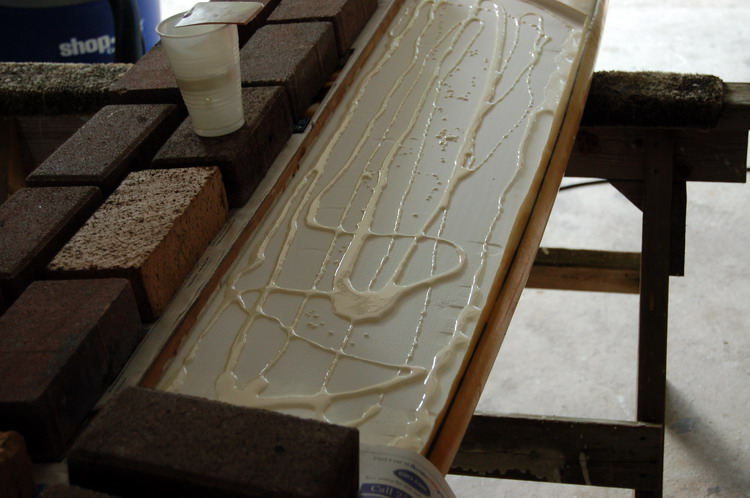
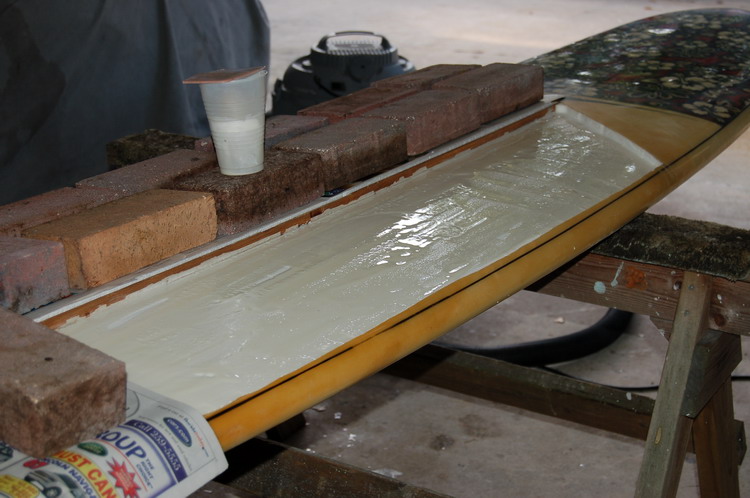
After sanding, I mixed up a batch of catalyzed resin and glass spheres and filled all the gaps. The fill process usually requires a 2nd coat to achieve a smooth finish since the mix will settle in the deeper crevices. Since I used a fast hardener, I was able to apply the final fill coat later on the same day. When working with epoxy, you often spend a lot of time waiting for it to harden.
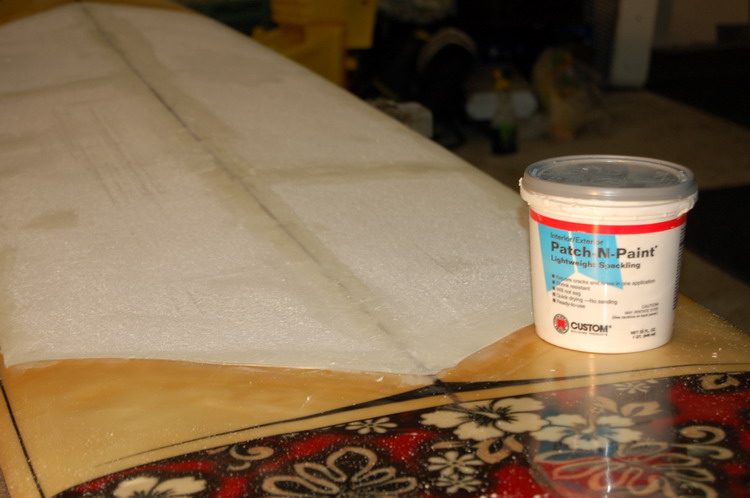
Because of the relatively large cell structure of expanded polystyrene foam, the shaped foam will have a lot of pores and be very absorbent. Unless you don't mind lots of air pockets under your glass laminate, you must deal with this issue. There are basically two ways. One is to mix up a think mix of catalyzed epoxy resin and glass spheres and trowel this mix over the foam to fill the pours. The other method is to use interior/exterior lightweight spackle. The lightweight spackle is much lighter than a mix of epoxy and glass spheres, and it takes quite a bit of filler. Also, you may have to do two coats. Every little low area or pore that isn't filled may show up as an air bubble under your glass. I ended up with quite a few air bubbles under the glass in the area where I overlapped the first layer of glass cloth.
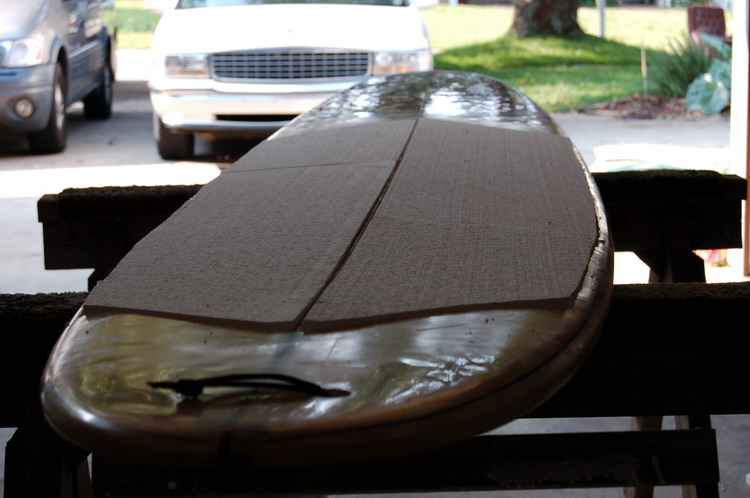
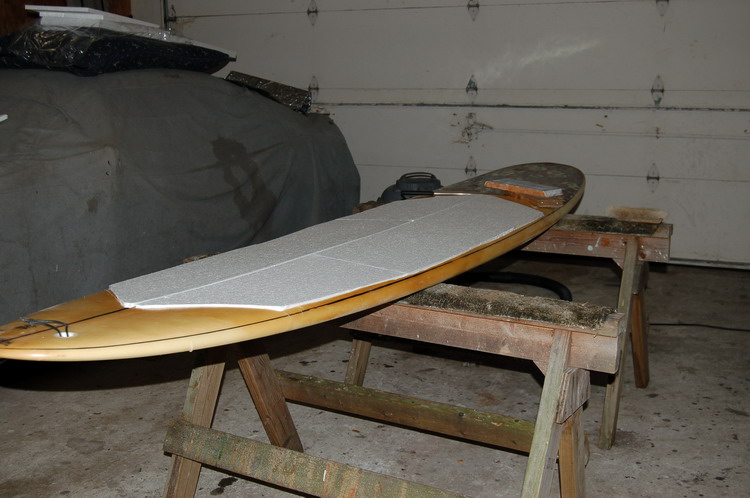
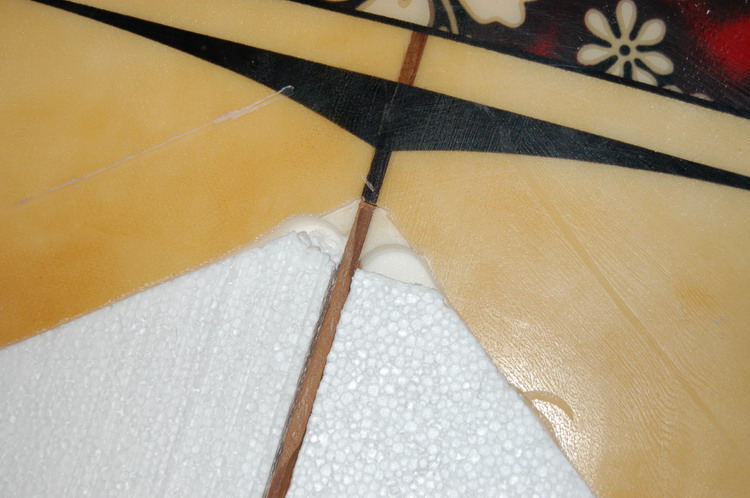
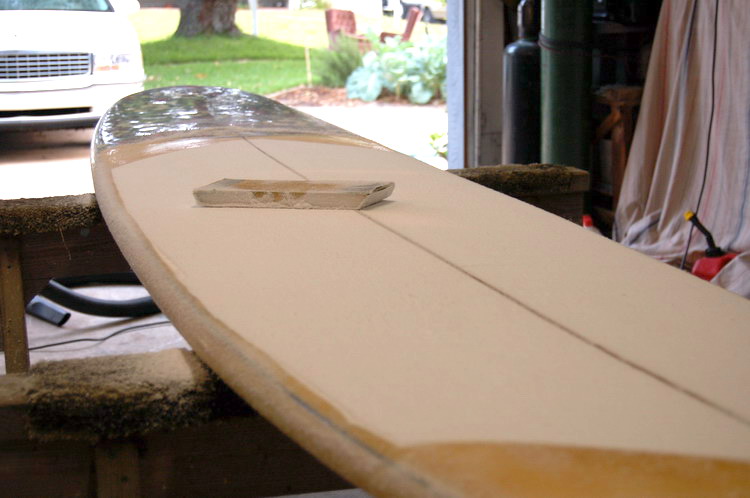
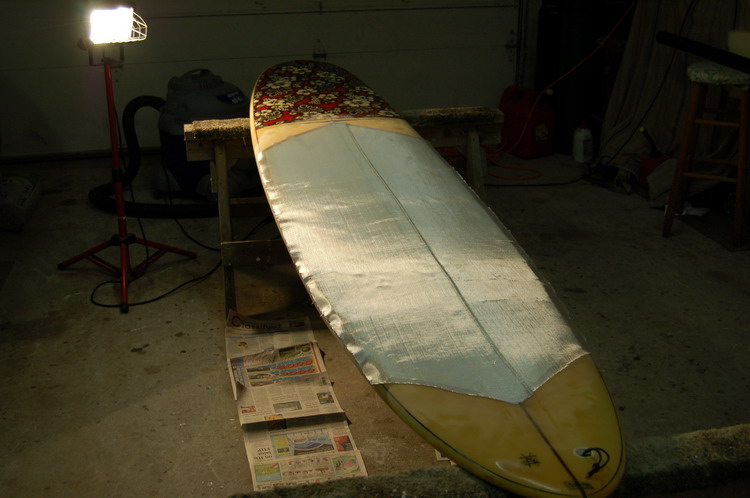
Since I used a relatively low density foam from Home Depot (which was probably a big mistake), I decided to laminate three layers of 6 ounce cloth over the patch instead of the traditional two layers. I also I decided to double lap the first layer over the stringer. Rather than try to laminate all three layers of cloth at once, I did one layer first, and then laminated the other two layers the next day after the first layer had set. Two layers at one time usually laminates pretty easily, but since I have never tried three layers of cloth in one step, and I knew the polystyrene foam was going to suck up the resin, I decided to play it safe. Below, you can see how I overlapped the first layer of cloth to make a four inch wide band over the stringer. I am hoping this will minimize stress cracks over the stringer as the deck gets compacted from use. After laminating all three layers, but before applying the hot coat of resin, the board weighted 21 pounds. It is still 2 pounds less than its beginning weight!
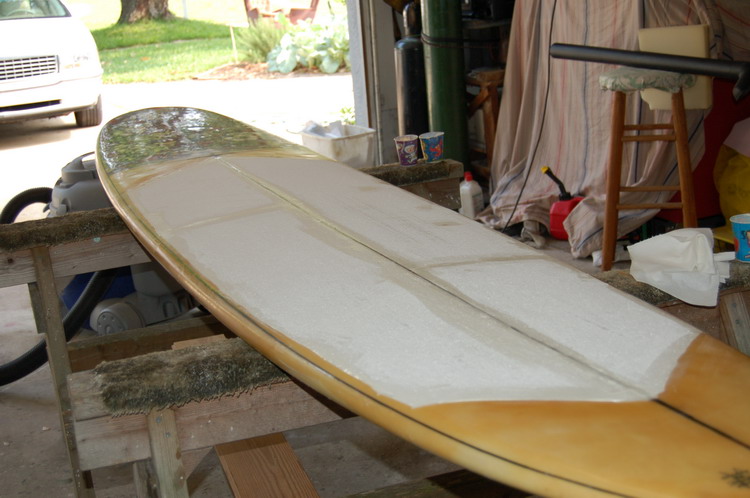
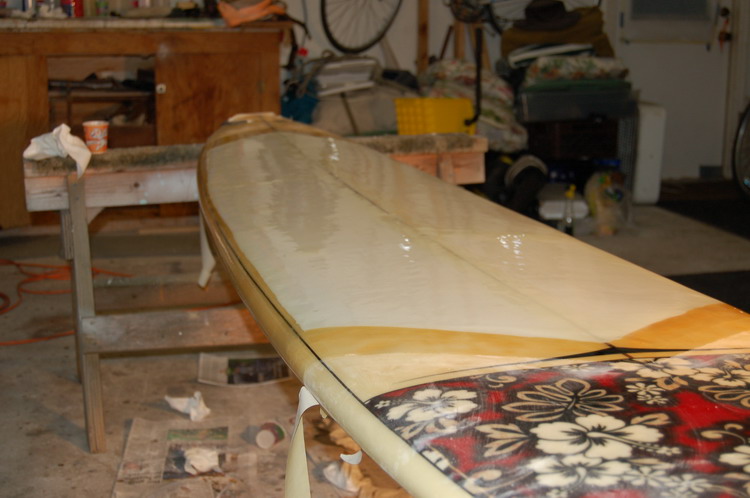
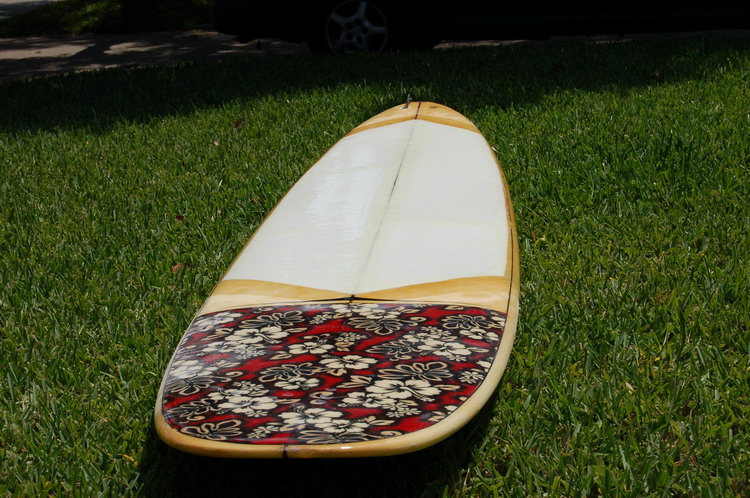
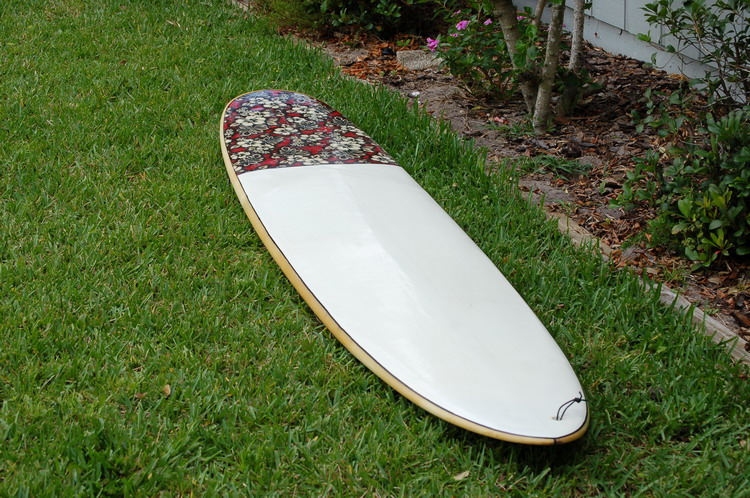
May 17, 2007 - The picture below was taken after I applied the hot coat resin. I am using a very slow epoxy that takes over 40 minutes just to gel. It looks like this one coat is going to be enough. After I sand it I am going to paint the top deck with Krylon Fusion to protect the epoxy from UV damage and make the board a little more cosmetically appealing. All totaled, I used less than $50.00 worth of materials. I didn't track my hours, but it was a lot of work. You would only want to do something like this for a board you like very, very much. This board was custom made as a small wave contest board for my son when he competed in ESA and NSSA contests. It is a 10 foot classic 1960's nose rider shape, made with 1996 technology. It has rounded rails and catches waves very easily in a small rolling swell.
If this patch holds up, this method would be a very good way to repair smaller delamination. In most cases when delamination occurs, the underlying foam has deteriorated to the extent that it may not make a good bond with filler or relamination. If the foam has deteriorated to any significant depth, sanding it out is your only recourse. If you have to go more than about a quarter of an of an inch down to get to good foam, you are pushing the limits for use of resin/glass-sphere filler. Routering out the foam like I did for this board is not difficult, just messy. It is easy to router a small hole to a uniform depth, and it wasn't hard to do this large area. I just used a guide bar to control the depth. Today is May 18, 2007. I will sand and paint the board after it cures for a few days, and have it ready to use in another week. If I haven't broken it, or it doesn't fall apart in a few months, I think we can consider this method as a viable approach for fixing delamination. You can bet your lunch money I won't take this board out in big surf any more.
The antique white Krylon Fusion paint looked almost tan compared to the pure white sitting next to it on the shelf. But compared to the aged epoxy on the rails from the last patch, the antique white looks VERY white. It won't stay that way for long. The only reason I used Fusion was because you don't need to use primer with Fusion when painting plastics. The deck feels a little soft when you stand on it. I think it will be OK, but don't use the white polystyrene foam from Home Depot, it is just a little too soft. The blue extruded polystyrene or foam from a surfboard shaper would have given a much firmer deck. May 24, 2007 - It has been 7 days since the hot coat, so I put the original fin back on and did a final weigh in. It came in right at 22 pounds, one pound less than when I started. Maybe when I weighed it the first time it still had the wax on it. |